Earn More With

Lowest Fees, Fast Transactions, Easy Tipping, 24/7 Support
Step 1
ARRO Pay Explained – Fixed Screen
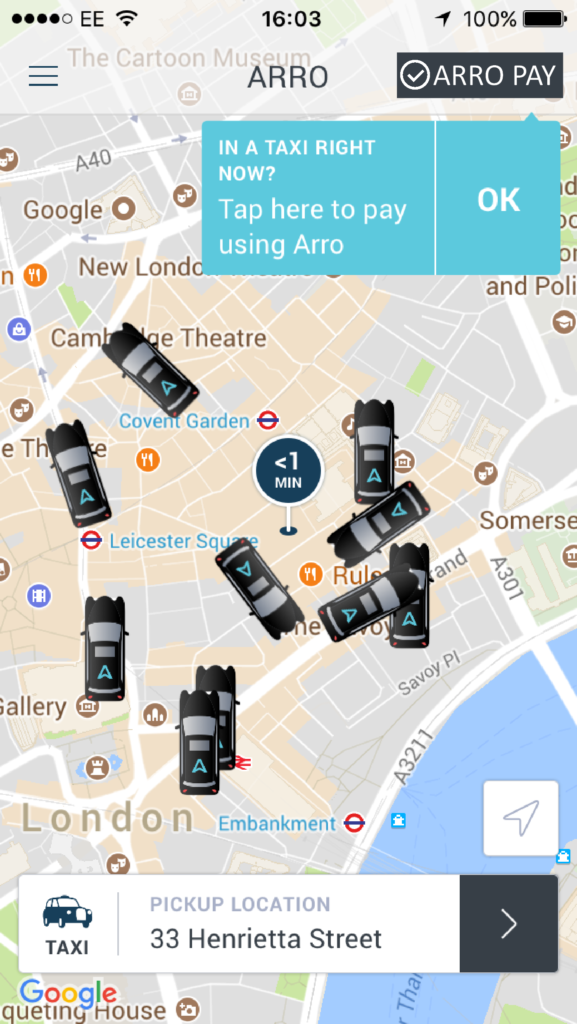
The passenger will see the ARRO PAY button on the top right of the ARRO home screen. When pressing this, the app will open the pairing screen shown in STEP 2.
Step 2
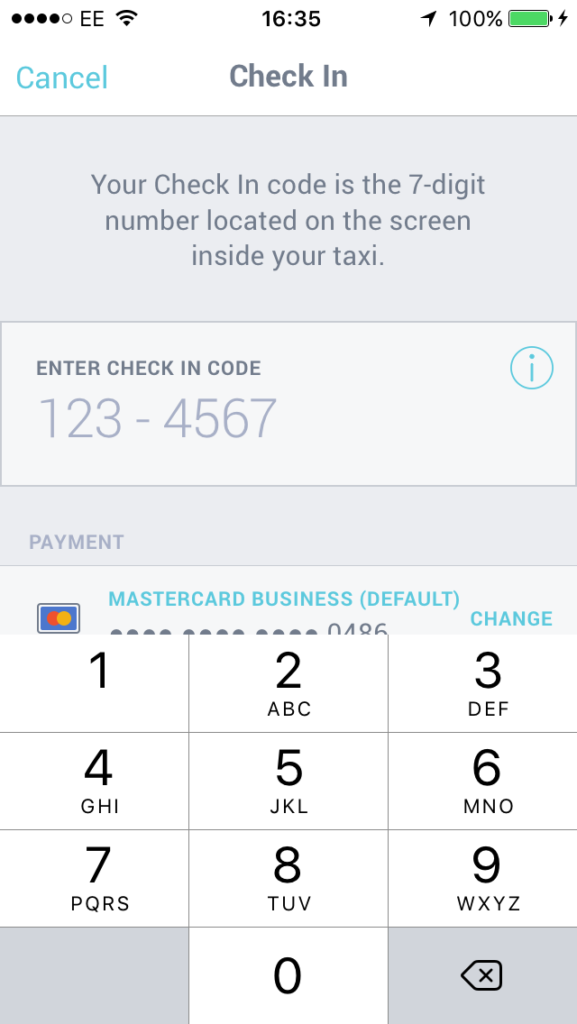
If the passenger would like to pair and pay, tell them the pairing code displayed on your fixed screen or tablet as below.They can then enter this on their phone.
Step 3
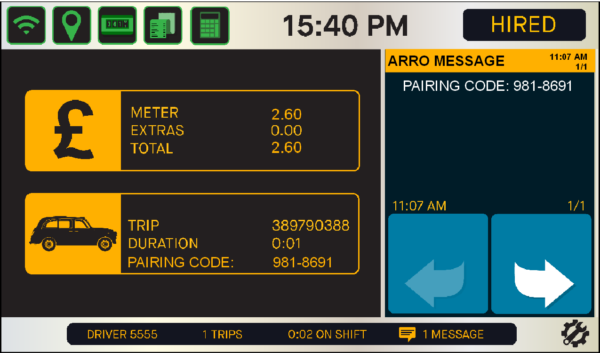
Tell the passenger the pairing code displayed in the message board and under the trip details.
Step 4
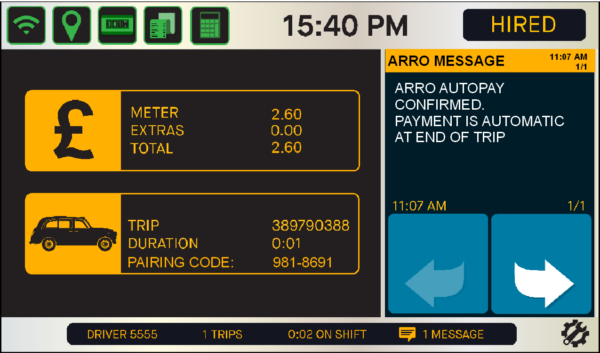
Within seconds the pairing code is confirmed and the screen will display ‘ARRO AUTOPAY CONFIRMED’. Continue with the journey, the passenger will be free to leave the cab when you arrive at their destination and you’ve stopped the meter. You will then see the transaction approved screen.
Step 5
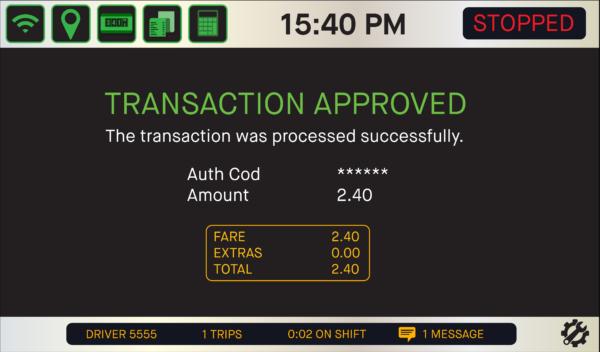
Once you STOP the meter the screen will display the Transaction Approved screen. The driver receipt will print and the passenger will be emailed their copy.
ARRO Pay Explained – Fixed Screen
Step 1

The passenger will see the ARRO PAY button on the top right of the ARRO home screen. When pressing this, the app will open the pairing screen shown in STEP 2.
Step 2

If the passenger would like to pair and pay, tell them the pairing code displayed on your fixed screen or tablet as below.They can then enter this on their phone.
Step 3

Tell the passenger the pairing code displayed in the message board and under the trip details.
Step 4

Within seconds the pairing code is confirmed and the screen will display ‘ARRO AUTOPAY CONFIRMED’. Continue with the journey, the passenger will be free to leave the cab when you arrive at their destination and you’ve stopped the meter. You will then see the transaction approved screen.
Step 5

Once you STOP the meter the screen will display the Transaction Approved screen. The driver receipt will print and the passenger will be emailed their copy.
ARRO Pay Video Demonstration – Fixed Front Screen

